Hello everyone,
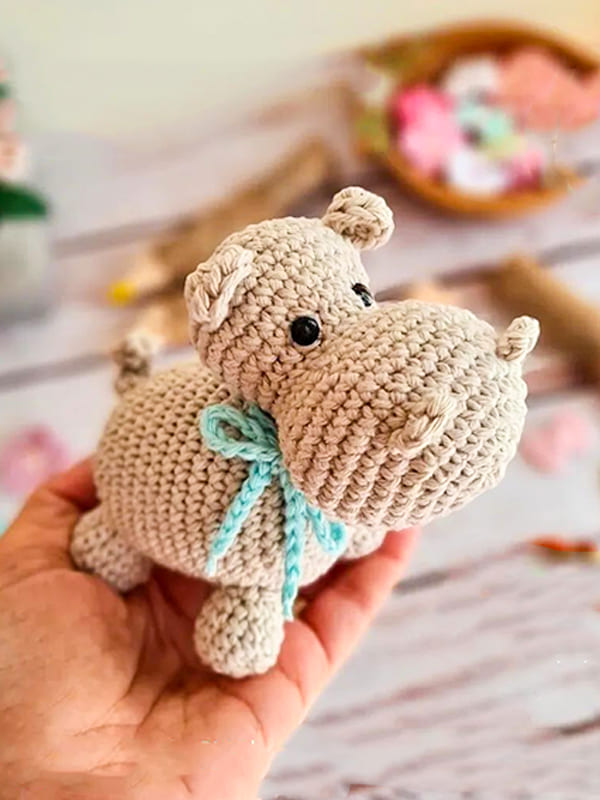
I shared the cute amigurumi baby hippo pattern for you. You can make amigurumi baby hippo patterns in different colors very easily step by step. You can use it as a wonderful decoration for the cribs of small children. When you complete the amigurumi pattern, it will be small enough to fit in the palm. If you want to make a gift for your loved ones, you can decorate the amigurumi toy differently. You can add a small hat, glasses. These small details will make the amigurumi pattern look more cute. We crochet all parts of the amigurumi pattern separately. You can make eyes using plastic accessories. You can make eyes using small buttons that you do not use at home. If you want, you can also make eyes using black thread. You can crochet each part of the amigurumi hippo pattern using different colors of yarn. Don’t forget to add the amigurumi hippo pattern to your favorite list.
PDF Cute Baby Hippo Amigurumi Free Pattern
Designer: @elrincondeale
Materials
• Semi thick yarn 8/6 in the colors you like
• Crochet hook size 2,5 mm or 2,75 mm
• Safety black eyes size 6 mm
• polyfiber fill for stuffing
• Rattle box amigurumis
• Pointerd tapestry needle
• Stitch markers
• Scissors
• Pins
Abbreviations
Ch– chain
MR– magic ring
Rnd– round
Slst– slip stitch
Sc– single crochet
Hdc– half double crochet stitch
BLO– back loop only
Inc– increase
Dec– decrease
(…)x: repeat the instructions between parenthesis as many times as indicated after the x
(…): quantity of made stitches of the round
Let’s start crocheting the amigurumi hippo pattern step by step. 🙂
Head
Rnd 1. 6 sc in a MR (6)
Rnd 2. 6 inc (12)
Rnd 3. (1 inc, 1sc) x6 (18)
Rnd 4. (1 inc, 2sc) x6 (24)
Rnd 5. (1 inc, 3sc) x6 (30)
Rnd 6. (1 inc, 4sc) x6 (36)
Rnd 7-10. 36sc (36) 4rnds
Rnd 11. (1 dec, 4sc) x6 (30)
Rnd 12. (1 dec, 3sc) x6 (24)
Rnd 13. (1 dec, 2sc) x6
Rnd 14. 18sc (18)
Rnd 15. (1 inc, 2sc) x6 (24)
Rnd 16. (1 inc, 3sc) x6 (30)
Rnd 17-20. 30 sc (30) 4rnds
Place the eyes on R16 with 3 or 4 visible stitches of separation between them.
Fill the trunk firmly.
Rnd 21. (1 dec, 3sc) x6 (24)
Rnd 22. (1 dec, 2sc) x6 (18)
Rnd 23. (1 dec, 1sc) x6 (12)
Make 1 sl st, cut the yarn leaving some rest to sew.
Finish filling tightly and close the head.
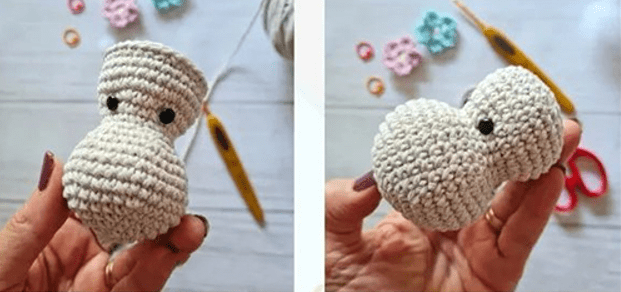
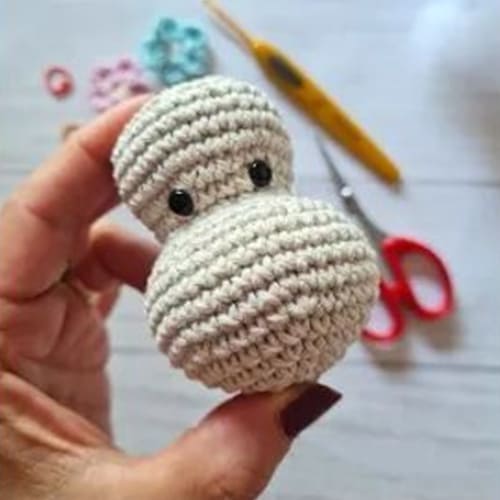
Note: You may close the head with 6 sc. In order for that make the R24 and knit 6 dec, close with 1 sl st. I like closing with 12 sc as shown on the images. You may give a little expression to the eyes by pushing them a bit inside the head, if you like.
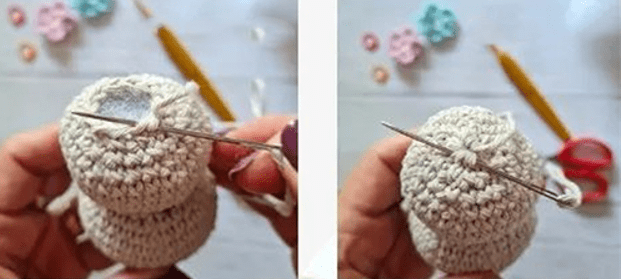
After completing the head part of the amigurumi hippo pattern, let’s crochet the ears 🙂
Ears
Knit 2 equal pieces.
Knit 2 beginning ch in a MR, (they count as 1 hdc) and 7 hdc (8 hdc)
Close with 1 sl st, adjust the MR tightly, cut the yarn leaving a thread to sew.
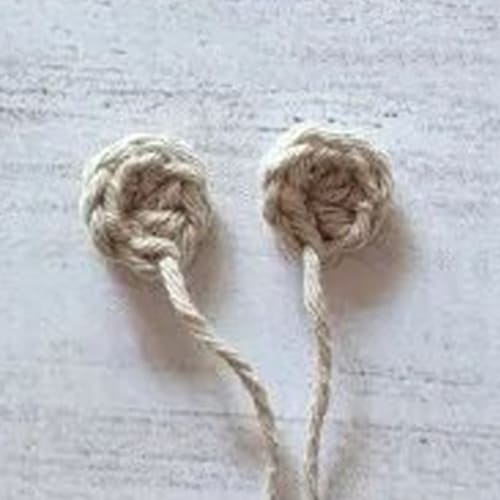
Let’s crochet the nostrils of the amigurumi hippo pattern 🙂
Nostrils
Knit 2 equal pieces.
Row 1. Make 4 ch
Row 2. On the 2nd ch from the hook, knit 2 sc and 1 sl st. Make a double knor with both threads, cut the yarn leaving some rest to sew. Don’t cut the beginning
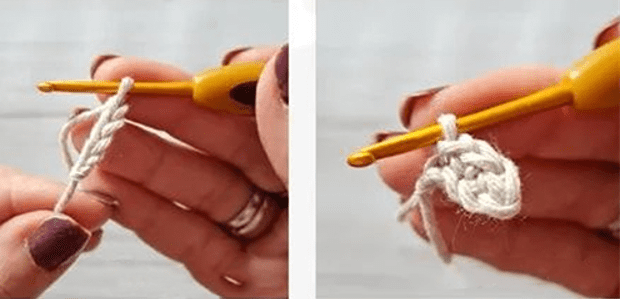
Let’s crochet the legs of the amigurumi hippo pattern. Next we will crochet the body part. Light brown yarn is preferred. 🙂
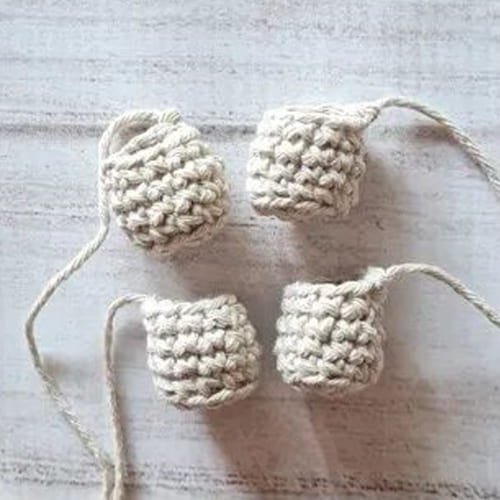
Stumpy legs
Knit 4 equal pieces.
Rnd 1. 6 sc in a MR (6)
Rnd 2. 6 inc (12)
Rnd 3. 12 sc BLO (12)
Rnd 4-5. 12 sc (12) 2rnds
Rnd 6. (1 dec, 4 sc) x2
Close with 1 sl st. Cut the yarn leaving a thread to sew.
When sewing you will fill them with polyfiber.
Body
Rnd 1. 6 sc in a MR (6)
Rnd 2. 6 inc (12)
Rnd 3. (1 inc, 1 sc) x6 (18)
Rnd 4. (1 inc, 2 sc) x6 (24)
Rnd 5. (1 inc, 3 sc) x6 (30)
Rnd 6. (1 inc, 4 sc) x6 (36)
Rnd 7-17. 36 sc (36) 11 rnds
Rnd 18. (1 dec, 4 sc) x6 (30)
Rnd 19. (1 dec, 3 sc) x6 (24)
Rnd 20. (1 dec, 2 sc) x6 (18)
Fill with a little polyfiber and insert the rattle box.
Rnd 21. (1 dec, 1sc) x6 (12)
Make 1 sl st, cut the yarn leaving a long thread to sew. Finish filling tightly with the polyfiber and close the body.
Leave a long thread from the body as shown on the 3rd image.

Assembly
• Sewthe ears onto the head counting 4 rounds above the eyes and leaving 6 stitches of separation between them approx
• Sew the nostrils on the round 6 from the MR with a 4 or 5 stitches separation distance approx. With the tapestry needle hide the remaining threads which had been inside the trunk.

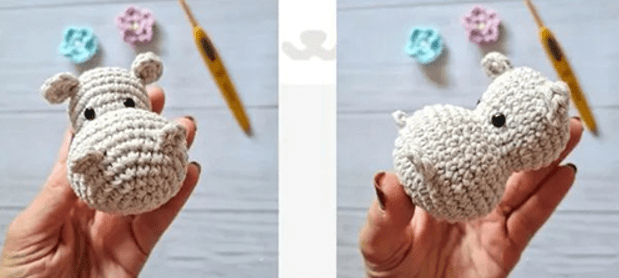
Congratulations, you have completed the amigurumi hippo pattern. 🙂


 Bear
Bear Bunny
Bunny Cat
Cat Christmas
 Crochet doll
 Deer
Deer Other animals

