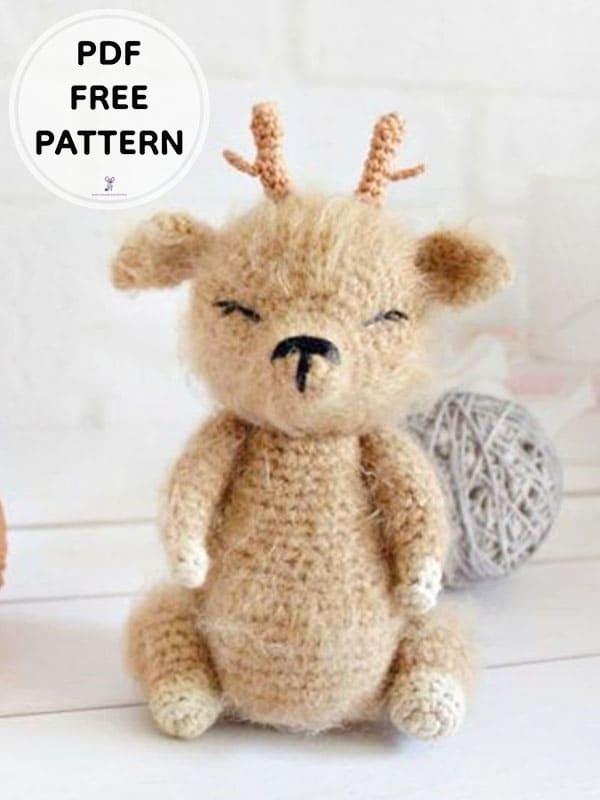
Hello to everyone who loves amigurumi,
Today I shared the amigurumi reindeer key chain pattern for you. The free amigurumi reindeer pattern is very easy to crochet step by step. Beginners to make amigurumi can easily do it. You can crochet free amigurumi pattern in different colors. You can crochet the Amigurumi toy for your loved ones or for children. The amigurumi keychain pattern is very cute. You can use it at your home or office. You can crochet the amigurumi keychain pattern as a gift. Let’s crochet all parts of the amigurumi reindeer pattern separately. After the parts are completed, let’s sew it to the body part. You can use a wire brush for the furry look of the amigurumi reindeer pattern. You should do this after the amigurumi pattern is completed. Thank you to the creator of the amigurumi reindeer pattern. Don’t forget to add to your favorite list and share.
PDF Crochet Reindeer Keychain Amigurumi Free Pattern
Designer: owls_happiness
Materials
• With fine yarn, YarnArt jeans, Nako Paris
• Black thread
• scissors, needle, hook
• Fiber for filling
Abbreviations
MR– magic ring
Sc– single crochet
Inc– increase
Dec– decrease
BLO-Back loop only
Rnd– round
Let’s start crocheting the amigurumi reindeer pattern 🙂
Ears (x2)
Rnd 1. 4 MR
Rnd 2. 4sc
Rnd 3. (1sc, 1 inc) x 4 (8)
Rnd 4. (2sc, 1 inc) x 4 (12)
Rnd 5. 12sc
Rnd 6. 12sc
Rnd 7. 12sc
Rnd 8. 6 dec (6)
Fasten and cut the thread, leaving a tail for sewing.
After completing the ears and horns of the free amigurumi pattern, let’s crochet the head part 🙂
Horns (x2)
With fine yarn in 2 threads
Rnd 1. 6 MR
Rnd 2. 6sc
Rnd 3. 6sc
Rnd 4. 6sc, continue, recruit 5 the point, from the second loop from the hook we knit 4sc and continue knitting in a spiral
Rnd 5. 6sc
Rnd 6. 6sc
Rnd 7. 6sc
Fasten and cut the thread, leaving a tail for sewing.
Head
Rnd 1. 6 MR
Rnd 2. 6 inc (12)
Rnd 3. 12sc
Rnd 4. 12sc
Rnd 5. (2sc, 1 inc) x 4 (16)
Rnd 6. 16sc
Rnd 7. 4sc, 8 inc, 4sc (24)
Rnd 8. 4sc, (1sc, 1 inc) x 8, 4sc (32)
Rnd 9. 32sc
Rnd 10. (7sc, 1 inc) x 4 (36)
Rnd 11. (5sc, 1 inc) x 6 (42)
Rnd 12. (6sc, 1 inc) x 6 (48)
Rnd 13-19. 48sc
Rnd 20. (6sc, 1 dec) x 6 (42)
Rnd 21. (5sc, 1 dec) x 6 (36)
Rnd 22. (4sc, 1 dec) x 6 (30)
Rnd 23. (3sc, 1 dec) x 6 (24)
Rnd 24. (2sc, 1 dec) x 6 (18)
Rnd 25. (1sc, 1 dec) x 6 (12)
Rnd 26. 6 dec (6)
Tighten the hole with a needle.
Sew the ears on the sides of the head, and the horns in the middle. On the face, we carefully embroider the nose and eyes, if desired, the eyes can be inserted on a secure mount or embroidered.
Let’s crochet the body part of the amigurumi toy 🙂
Body
Rnd 1. 6 MR
Rnd 2. 6 inc (12)
Rnd 3. (1sc, 1 inc) x 6 (18)
Rnd 4. (2sc, 1 inc) x 6 (24)
Rnd 5. (3sc, 1 inc) x 6 (30)
Rnd 6. (4sc, 1 inc) x 6 (36)
Rnd 7. (5sc, 1 inc) x 6 (42)
Rnd 8. (6sc, 1 inc) x 6 (48)
Rnd 9-14. 48sc
Rnd 15. 16sc, 8 dec, 16sc (40)
Rnd 16. 40sc
Rnd 17. 40sc
Rnd 18. (8sc, 1 dec) x 4 (36)
Rnd 19. (4sc, 1 dec) x 6 (30)
Rnd 20. 30sc
Rnd 21. 30sc
Rnd 22. (3sc, 1 dec) x 6 (24)
Rnd 23. 24sc
Rnd 24. 24sc
Rnd 25. 24sc
Rnd 26. (3sc, 1 dec) x 6 (18)
Fasten, cut the thread, leaving a tail for sewing on the head.
Let’s crochet the arms and legs of the amigurumi reindeer 🙂
Arms (x2)
Start with YarnArt jeans
Rnd 1. 6 MR
Rnd 2. 6sc behind the BLO
Rnd 3. 6sc and change to the main yarn, I have Nako Paris
Rnd 4. (1sc, 1 inc) x 3 (9)
Rnd 5. 9sc
Rnd 6. 9sc
Rnd 7. (2sc, 1 inc) x 3 (12)
Rnd 8. 12sc
Rnd 9. 12sc
Rnd 10. 12sc
Rnd 11. (1sc, 1 dec) x 3 (9)
Rnd 12. (1sc, 1 dec) x 3 (6)
Close and tighten the hole
Legs (x2)
Start YarnArt jeans
Rnd 1. 6 MR
Rnd 2. 6 inc (12)
Rnd 3. 12sc behind the BLO
Rnd 4. 12sc and change to the main yarn, I have Nako Paris
Rnd 5. (3sc, 1 inc) x 3 (15)
Rnd 6. 15sc
Rnd 7. 15sc
Rnd 8. (4sc, 1 inc) x 3 (18)
Rnd 9. 18sc
Rnd 10. 18sc
Rnd 11. 18sc
Rnd 12. (1sc, 1 dec) x 6 (12)
Rnd 13. 6 dec (6)
Close and tighten the hole
Let’s crochet the tail of the amigurumi reindeer 🙂
Tail
Rnd 1. 4 MR
Rnd 2. 4sc
Rnd 3. 4 inc (8)
Rnd 4. (1sc, 1 inc) x 4 (12)
Rnd 5. (2sc, 1 inc) x 4 (16)
Rnd 6. 16sc
Rnd 7. 16sc
Rnd 8. 16sc
Rnd 9. (2sc, 1 dec) x 4 (12)
Rnd 10. 6 dec (6)
Fasten and cut the thread, leaving a tail for sewing.
We sew the head to the body, I have convex part- this is the tummy, but if you sew the head on the contrary and a little on the side, it turns out that it lies on the tummy and booty up. All legs are made on a thread mount. The tail is sewn on the back, and the reindeer itself can be combed.
Congratulations, you have completed the amigurumi reindeer pattern. 🙂


 Bear
Bear Bunny
Bunny Cat
Cat Christmas
 Crochet doll
 Deer
Deer Other animals

