Hello everyone,
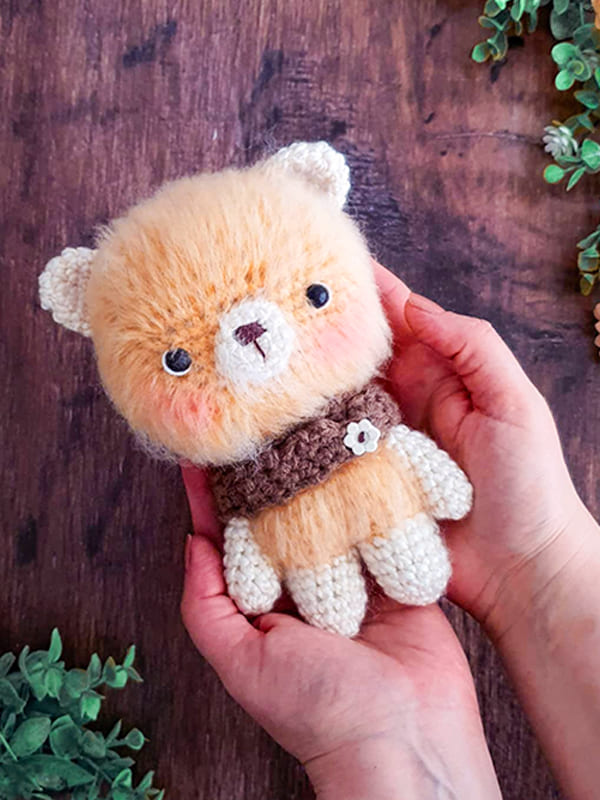
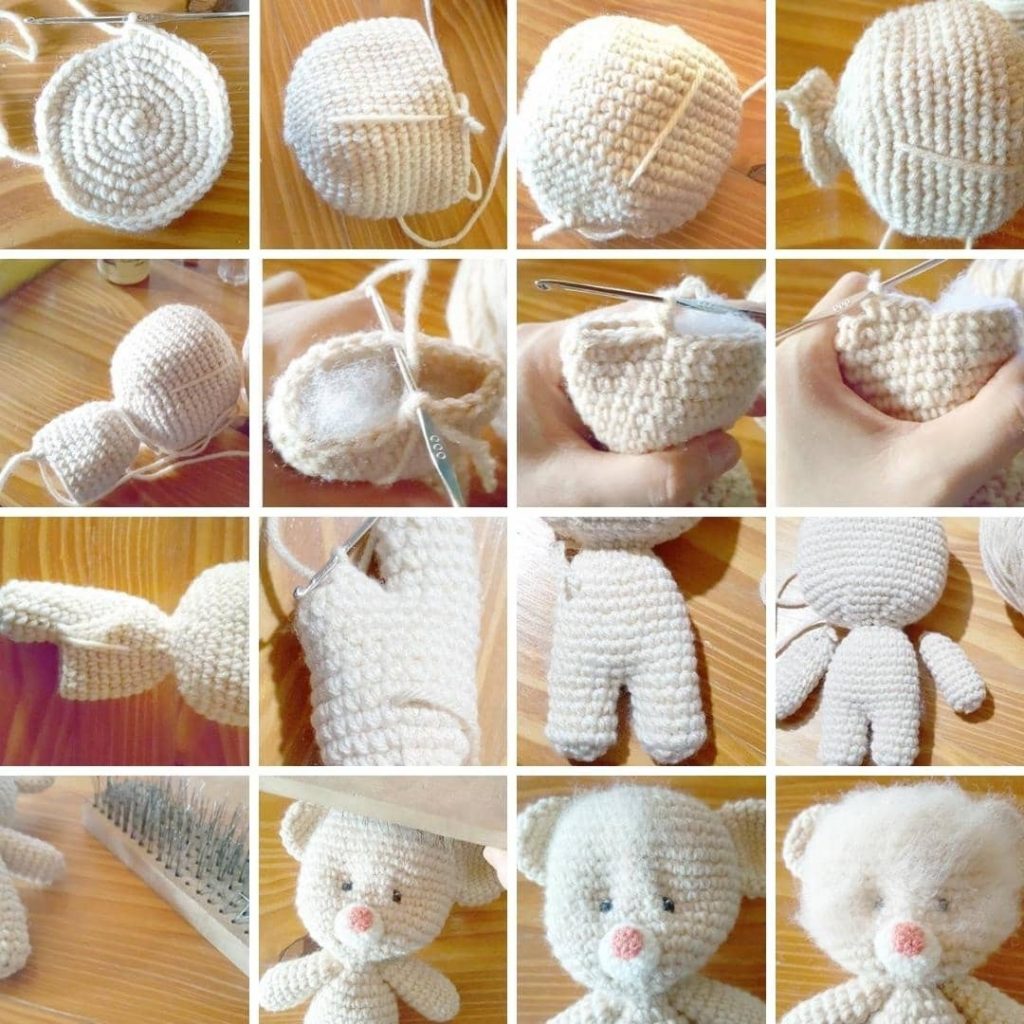
Today I shared the cute amigurumi bear toy pattern for you. It is very easy to make a free amigurumi bear pattern step by step. The difficulty level of the free pattern; middle. You can crochet the amigurumi bear pattern using any color yarn you want. You can use a wire brush to make the amigurumi toy fluffy. He showed how to make the amigurumi pattern creatively by making it on his Youtube channel. You can also get help here. All parts of the amigurumi bear pattern are crocheted separately. After all the parts are completed, they are sewn to the body part. You can make the eyes of the Amigurumi teddy bear pattern using plastic accessories. You can make scarves from fabrics that you do not use for the amigurumi bear pattern. Thank you to the creator of the amigurumi pattern. Don’t forget to add it to your favorite list.
PDF Crochet Furry Teddy Bear Amigurumi Free Pattern
Designer: @vivir_vintage
Materials
• 3,75 Gauge honey acrylic yarn
• 4,0 Gauge chocolate acrylic yarn
• Natural silky acrylic with cotton yarn
• 3 strand brown cotton yarn
• 6 strand white cotton yarn
• Fiberfill stuffing
• 10 mm safety eyes
• 15 mm button
• Scissors
• 4,0 mm crochet hook
• Stitch marker
Abbreviations
MR– magic ring
Sc– single crochet
Inc– increase
Dec– decrease
Ch– chain
Slst– slip stitch
Arm (x2)
Natural silky acrylic with cotton yarn
Rnd 1. 8 sc in MR (8)
Rnd 2-10. sc in all 8 stitches (8)
Fasten off and leave thread for sewing.
Stuff with fiberfill.
Ear (x2)
3,75 gauge honey acrylic yarn
Rnd 1. 6 sc in MR (6)
Rnd 2. inc, repeat 6 times (12)
Rnd 3-5. sc in all 12 stitches (12)
Fasten off and leave thread for sewing.
Scarf
4,0 gauge chocolate acrylic yarn
Crochet scarf in rows not in rounds.
Rnd 1. Chain 4 (4)
Rnd 2-46. Fron 3rd chain from hook crochet 3sc, chain 1, turn (3)
In next row you will crochetbuttonhole
Rnd 47. Chain 3, 3sc
Fasten off and hide all threads.
At the end you will sew button.
Snout
Cotton with silky acrylic butter
Rnd 1. 6 sc in MR (6)
Rnd 2. inc, repeat 6 times (12)
Fasten off and leave thread for sewing
Head
3,75 gauge honey acrylic yarn
Rnd 1. 6 sc in MR (6)
Rnd 2. inc, repeat 6 times (12)
Rnd 3. sc, inc, repeat 6 times (18)
Rnd 4. 2sc, inc, repeat 6 times (24)
Rnd 5. 3sc, inc, repeat 6 times (30)
Rnd 6. 4sc, inc, repeat 6 times (36)
Rnd 7. 5sc, inc, repeat 6 times (42)
Rnd 8-17. sc in all 42 stitches (42)
Rnd 18. 5sc, dec repeat 6 times (36)
Rnd 19. 4sc, dec repeat 6 times (30)
Place safety eyes between rounds 13 and 14 leaving 8 stitches apart. Sew snout in the center of the eyes leaving 2 stitches of separation between eyes. Continue crocheting head
Rnd 20. 3sc, dec repeat 6 times (24)
Rnd 21. 2sc, dec repeat 6 times (18)
Stuff head with a little bit of fiberfill
On round 22 start crocheting body.
Body
3,75 gauge honey acrylic yarn
Rnd 22. sc in all 18 stitches (18)
Rnd 23. 2sc, 1 inc repeat 6 times (24)
Rnd 24-30. sc in all 24 stitches (24)
Change color to natural silky acrylic with cotton yarn. Stuff body with fiberfill. Now divide the 24 stitches of the body in half to make the legs count backwards 12 stitches from the last stitches of round 30 and place the stitch marker. These 12 stitches will correspond to LEG 1
The remaining 12 correspond to LEG 2
Leg 1
Natural silky acrylic with cotton yarn
Row 31-35. sc in all 12 stitches (12)
Stuff leg with fiberfill
Row 36. dec, repeat 6 times (6)
Close last 6 stitches and hide thread
Repeat this pattern with the remaining 12 stitches and this how you crochet Leg 2.

Assembly
• Before sewing I recommend you make furry your amigurumi. To do so you need a brush with metal bristles. You can find them in hardware stores or pet shops.
• Brush only the acrylic yarn part of the teddy using the metal bristle brush. As you brush the fur will appear. The more you brus. The more volume of fur the bear will have. Remember to always do it gently. (You can visit the Youtube page of the creator of the Amigurumi pattern to see how it is made.)
• Sew arms on each side of the body just below the head.
• Sew snout between the eyes.
• Sew ears between rounds 6 and 11 of head.
• Sew button on the opposite end of the scarf. Then wrap it 2 times through the bear’s neck and pass the button through the buttonhole.
• With 3 strand brown cotton yarn embroider nose.
• With 6 strand white cotton yarn embroider the light of the eyes.
• Optional: Blush cheeks
Congratulations, you have completed the amigurumi bear pattern. 🙂


 Bear
Bear Bunny
Bunny Cat
Cat Christmas
 Crochet doll
 Deer
Deer Other animals

