Hello everyone,
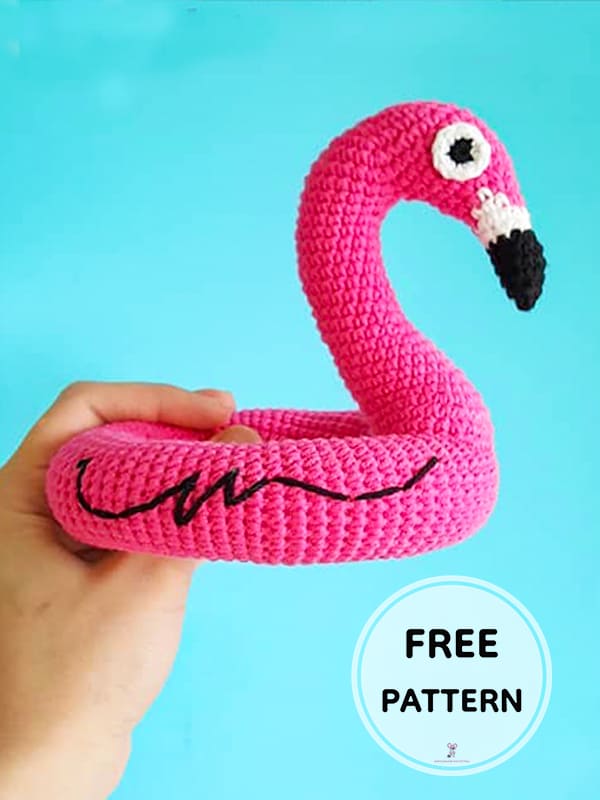
Today I shared the amigurumi flamingo pattern for you. You can make free amigurumi pattern easy step by step. Amigurumi toy beginners can easily make. You can crochet the amigurumi flamingo pattern for children and for your loved ones. You can crochet the free amigurumi toy pattern using different colors of yarn. The amigurumi patterns is crocheted using three colors of yarn. We start crocheting the free pattern from the head. After completing the head part, let’s crochet the neck part. We will crochet the body part like an inflatable ring. After completing the amigurumi bird pattern, let’s crochet the wing pattern with black yarn. After completing the eyes, let’s sew it to the head. Thank you to the creator of the amigurumi flamingo pattern. Don’t forget to add to your favorite list and share.
PDF Crochet Cute Flamingo Amigurumi Free Pattern
Designer: natura_crochet
Materials
• Three color yarn, pink, white and black (I use YarnArtJean’s)
• 2 mm crochet hook (or another convenient hook for you)
• Fiberfill
Abbreviations
Ch– chain
Sc– single crochet
Inc– increase
Dec– decrease
St(s) – stitch(es)
Let’s start crocheting the amigurumi flamingo pattern. 🙂
Start knitting in pink
Rnd 1. 6 sc into magic ring (6st)
Rnd 2. inc in all 6 st (12st)
Rnd 3. (1sc, inc) repeat 6 times (18st)
Rnd 4. (2sc, inc) repeat 6 times (24st)
Rnd 5. (3sc, inc) repeat 6 times (30st)
Rnd 6. (4sc, inc) repeat 6 times (36st)
Fold the circle in half and tie only 18 loops, this will be the beginning of the head.
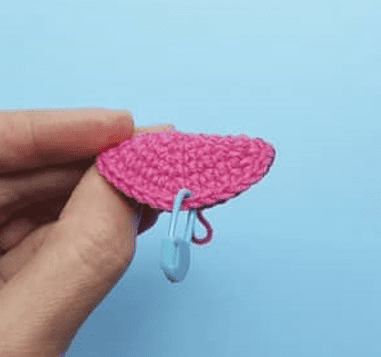
Head
Rnd 7. 7sc in all 18st
Rnd 8. 6sc, inc, 2sc, inc, 8sc (20st)
Rnd 9. sc in all 20st
Rnd 10. 6sc, dec, 1sc, dec, 9sc (18st)
Rnd 11. sc in all 18 st
Rnd 12. (4sc, dec) repeat 3 times (15st)
Knit face, add white (W), pink marked (P)
Rnd 13. 1sc (P), dec (P), 1sc (W), 3sc (P), dec (P), 2sc (P), 1sc (W), 1sc (P), dec (P) (12st)
Rnd 14. 1sc (P), 3sc (W), 1sc (P), dec (P), 1sc (P), 3sc (W), 1sc (P)(11st)
Cut the pink thread and continue to knit only in white.
Rnd 15. sc in all 11 st
Rnd 16. 5sc, dec, 4sc (10st)
Change the white thread to black, cut the white
Rnd 17. 5sc, inc, 4sc (11st)
Rnd 18. 6sc, inc, 4sc (12st)
Rnd 19. (2sc, dec) repeat 3 times (9st)
Rnd 20. sc in all 9st
Rnd 21. (1sc, dec) repeat 3 times (6st)
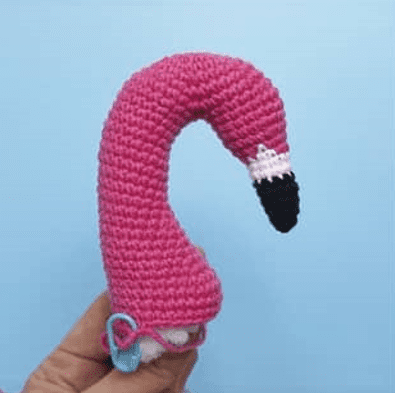
Close the hole. Fill from the side of the neck, straighten the beak, continue to knit. We begin to knit the neck., like a head, which we knit the remaining 18 loops in pink.
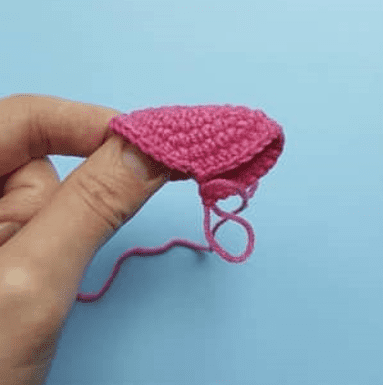
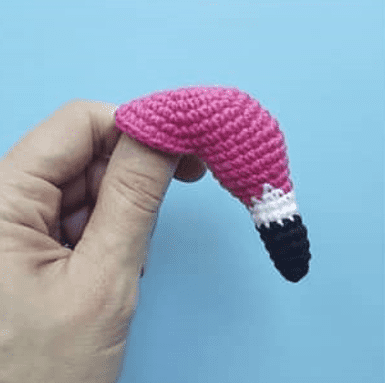
We have completed the head part of the free amigurumi pattern. Now let’s crochet the neck part step by step 🙂
Neck
When knitting, note that all increases and contractions mostly go along the ridge.
Rnd 1-3. sc in all 18st
Rnd 4. 7sc, inc, 10sc (19st)
Rnd 5. sc in all 19st
Rnd 6. 8sc, dec, 8sc, inc (19st)
Rnd 7-8. sc in all 19st
Rnd 9. 9sc, dec, 8sc (18st)
Rnd 10. inc, 17sc (19st)
Rnd 11. sc in all 19st
Rnd 12. 9sc, dec, 8sc (18st)
Rnd 13. inc, 17sc (19st)
Rnd 14. inc, 1sc, inc, 7sc, dec, 7sc (20st)
Rnd 15. sc in all 20st
Rnd 16. 1sc, inc, 2sc, inc, 15sc (22st)
Rnd 17. 14sc, dec, 6sc (21st)
Rnd 18. 2sc, inc, 1sc, inc, 1sc, inc, 14sc (24st)
Rnd 19. 3sc, inc, 1sc, inc, 1sc, inc, 16sc (27st)
Rnd 20. 4sc, inc, 1sc, inc, 1sc, inc, 18sc (30st)
Rnd 21. sc in all 30st
Rnd 22. 6sc, dec, 2sc, dec, 11sc, inc, 1sc, inc, 4sc (30st)
Rnd 23. sc in all 30 st
Tightly fill with filler, giving shape to the neck. Cut the thread, leaving a long tail for sewing.
Let’s crochet the ears of the amigurumi pattern 🙂
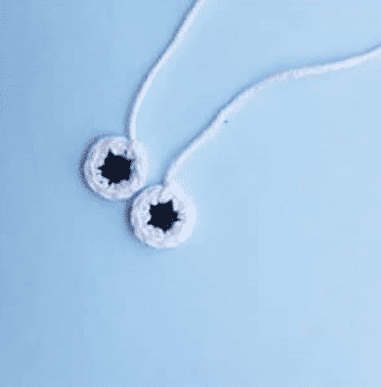
Eye (make2)
Start knitting black
Rnd 1. 5sc into magic ring (5st)
Change color to white
Rnd 2. inc in all 5st (10st)
Let’s crochet the body part of the amigurumi flamingo pattern 🙂
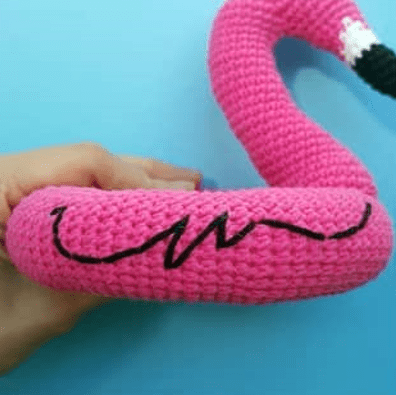
Inflatable Circle
Ch 22, close the ring. Next, knit in a circle. It all depends on what kind of circle you wantor equal to the circumference of the body of the toy, or on the fact that it can sit on it. Complete the knitting process. Sew ends,
trim threads.
Assembly
Sew the neck of the flamingo to the circle. We sew eyes and embroider wings.
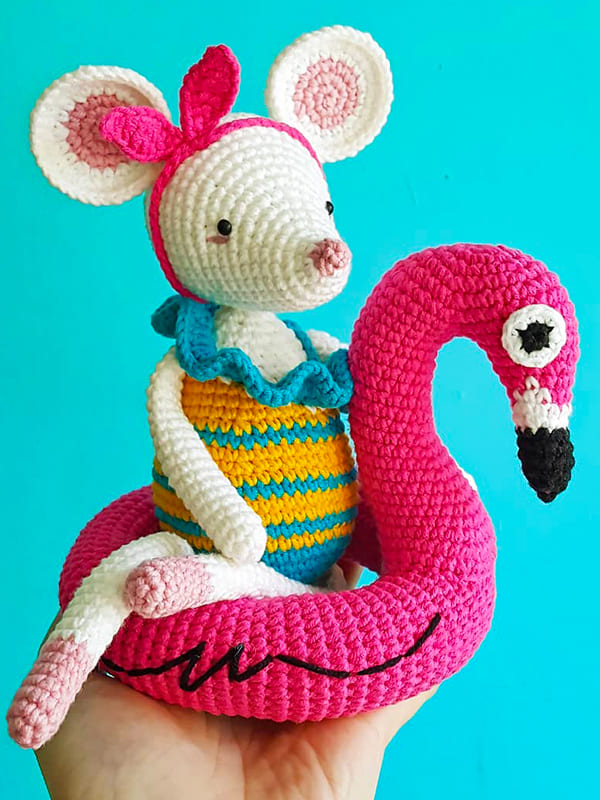
Congratulations, you have completed the amigurumi flamingo pattern 🙂



 Bear
Bear Bunny
Bunny Cat
Cat Christmas
 Crochet doll
 Deer
Deer Other animals