Hello everyone,
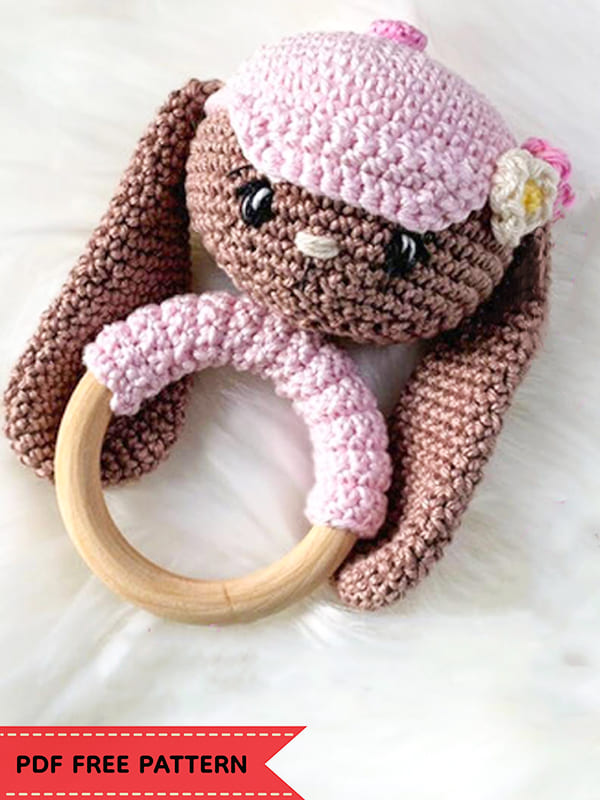
Today I shared the cute rabbit rattle amigurumi pattern for you. Amigurumi bunny Milla rattle pattern is very easy to make step by step. You can crochet the amigurumi pattern as a newborn baby gift. You can crochet free amigurumi pattern in different colors. You can replace the flower patterns on the head of the Amigurumi rabbit pattern with different flower patterns. The eyes of the free amigurumi pattern are crocheted using black yarn. It is a safe toy for children. Let’s make the head part of the crochet bunny pattern. we will crochet the hat and ears separately. After completing the amigurumi flower patterns, let’s sew all the pieces in place. Thank you to the creator of the amigurumi rattle pattern. Don’t forget to add it to your favorite list.
PDF Crochet Bunny Milla Rattle Amigurumi Free Pattern
Designer: emmas.handcraft & ninnisvirkstagram
You will need
• 3-4 different colors of yarn
• A crochet hook that matches the yarn of your choice
• Fiberfill stuffing
• Embroidery thread/ sewing thread
• Tapastry needle
• Stitch markers
Abbreviations
St– stitches
MR– magic ring
Slst- slip stitch
Sc– single crochet
Inc– increase- 2sc in 1 st
Dec– decrease, 2sc together
BLO– back loops only
ch – chain
hdc – half double crochet
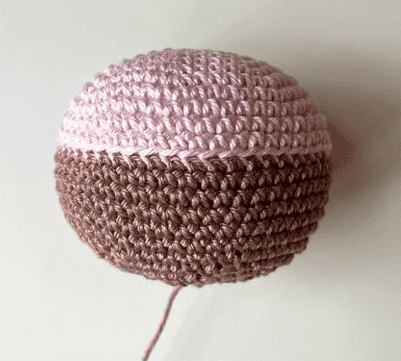
Head
With pink yarn
Rnd 1. Make a MR, crochet 7sc in the MR and pull together (7)
Rnd 2. 1 inc in each st of the round (14)
Rnd 3. (1sc, 1 inc) repeat 7 times (21)
Rnd 4. (2sc, 1 inc) repeat 7 times (28)
Rnd 5. (3sc, 1 inc) repeat 7 times (35)
Rnd 6. (4sc, 1 inc) repeat 7 times (42)
Rnd 7. (5sc, 1 inc) repeat 7 times (49)
Rnd 8-11. sc each st of the round (49) (4 rounds in total)
Change colour to brown
Rnd 12. sc in each st of the round in BLO (49)
Rnd 13-17. sc each st of the round (49) (5 rounds in total)
Rnd 18. (5sc, 1 dec) repeat 7 times (42)
Rnd 19. (4sc, 1 dec) repeat 7 times (35)
Rnd 20. (3sc, 1 dec) repeat 7 times (28)
Put the rattle inside the head and start to stuff the head.
Rnd 21. (2sc, 1 dec) repeat 7 times (21)
Rnd 22. (1sc, 1 dec) repeat 7 times (14)
Stuff the head some more.
Rnd 23. (1 dec) repeat 7 times (7)
Fasten off with a slst and sew together. Leave a yarn tail for sewing the head to the wooden ring.
Cap
With pink yarn.
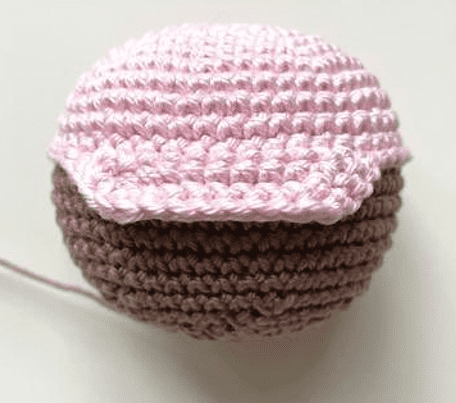
Insert your hook in the BLO (R12) on the head with the hook stitch downwards (from pink to brown), and ch 1
Rnd 1. 1 sc in the next 12 st (12) ch 1 and turn
Rnd 2. 1 dec, 1 sc in the next 8 st, 1 dec (10)
Ch 1 and turn
Rnd 3. 1 sc in each of the st (10)
Ch 1 and turn
Rnd 4. 1 dec, 1 sc in the next 6 st, 1 dec (8)
Now don’t ch 1 or turn your project. Continue on the side of the brim, crochet 4 slst along the side. Then you get to the BLO on R12 of the head. First slst where you attached the yarn to the BLO. Then make a slst in each st around the head (37)
When you get to the side of the brim, crochet 4 slst along the side of the brim and then 7 slst on the front brim before fastening off with a slst. Weave in your yarn tails.
Button-for Cap
With dark pink yarn.
Rnd 1. make a MR, crochet 5 sc in the MR and pull together (5)
Rnd 2. 1 inc in each st of the round (10)
Rnd 3. slst in each st of the round (10)
Fasten off with a slst and leave a yarn tail for sewing. Sew the button on the top of the head, over the magic ring.
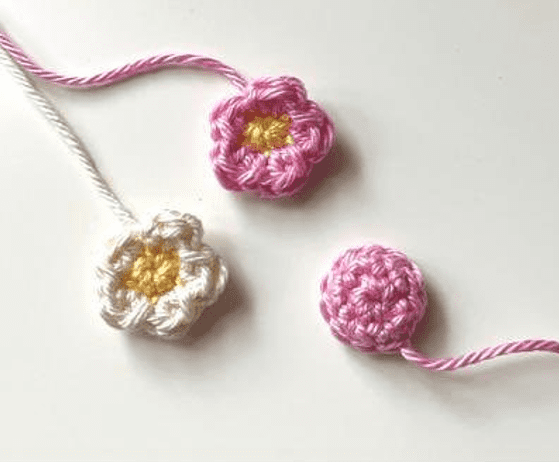
Flowers (x2)
With yellow yarn.
Rnd 1. Make a MR, crochet 5sc in the MR and pull togerher, slst in first st (5)
Change colour to pink
Rnd 2. (2hdc, 1slst in the same st) repeat 5 times in total (10)
Fasten off with a slst and weave in yarn tails. Save a yarn tail for sewing.
Face
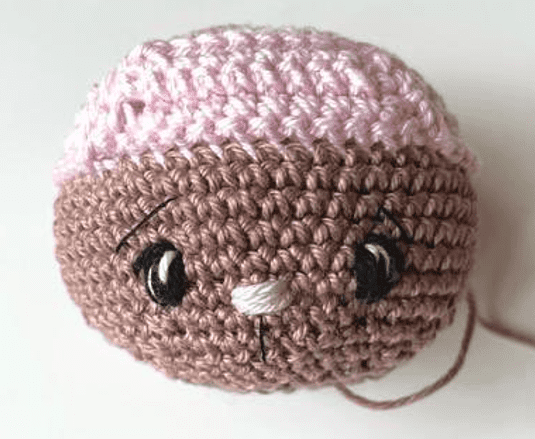
Embroider eyes between row 16-17, 6-7 st apart. Embroider the eyebrows from 2 rows above the eyes, and go down 2 rows, make them 2-3 st wide. Embroider the nose between the safety eyes. With the same yarn, embroider small cheeks under the eyes. Fasten off all the yarn tails.
Ears (x2)
With brown yarn.
Rnd 1. Make a MR, crochet 6sc in the MR and pull together (6)
Rnd 2. 1 inc in each st of the round (12)
Rnd 3. (1sc, 1 inc) repeat 6 times (18)
Rnd 4. (2sc, 1 inc) repeat 6 times (24)
Rnd 5-6. sc each st of the round (24) (2 rounds in total)
Rnd 7. (1 dec, 10sc) repeat 2 times (22)
Rnd 8. sc each st of the round (22)
Rnd 9. (1 dec, 9sc) repeat 2 times (20)
Rnd 10. sc each st of the round (20)
Rnd 11. (1 dec, 8sc) repeat 2 times (18)
Rnd 12-13. sc each st of the round (18) (2 rounds in total)
Rnd 14. (1 dec, 7sc) repeat 2 times (16)
Rnd 15-16. sc each st of the round (16) (2 rounds in total)
Rnd 17. (1 dec, 6sc) repeat 2 times (14)
Rnd 18-20. sc each st of the round (14) (3 rounds in total)
Rnd 21. (1 dec, 5sc) repeat 2 times (12)
Rnd 22-23. sc each st of the round (12) (2 round in total)
Rnd 24. (1 dec, 4sc) repeat 2 times (10)
Rnd 25-26. sc each st of the round (10)
Rnd 27. (1 dec, 3sc) repeat 2 times (8)
Rnd 28-29. sc each st of the round (8) (2 rounds in total)
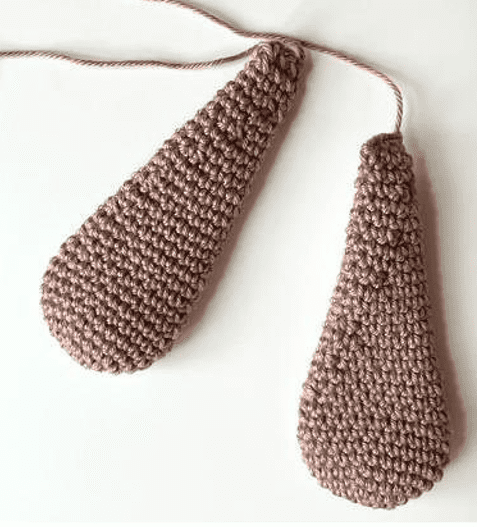
Fold the ears together and crochet 3 sc trough both layers. Fasten off with a slst and leave yarn tail for sewing.
Strip for wooden ring
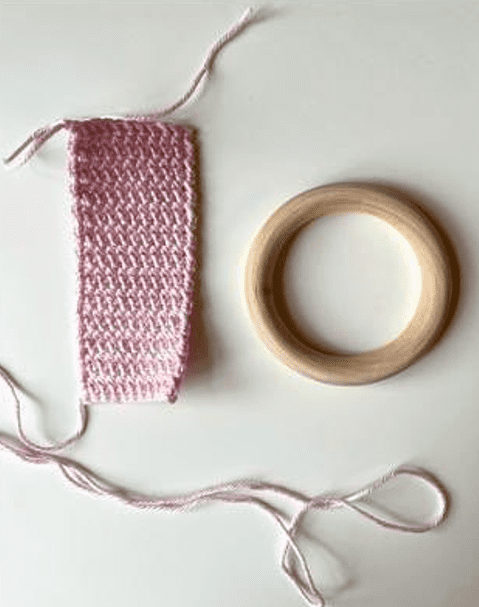
With pink yarn. You may have to adjust the number of ch and sc depending on the circumference of the wooden ring.
Rnd 1. ch 11, turn
Rnd 2. in second ch from the hook, sc in each st of the row (10)
Rnd 3-25. ch 1, turn, sc each st of the round (10)
Fasten off with a slst and leave a yarn tail for sewing.
Assembling
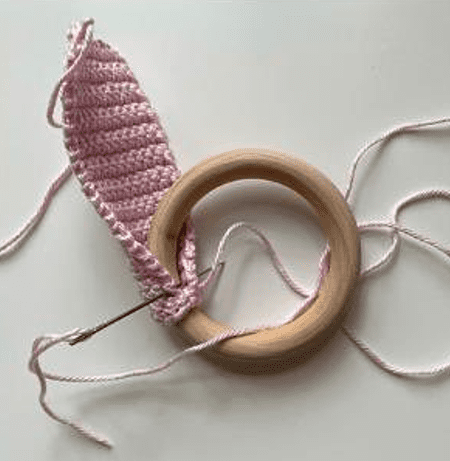
Sew the strip around the wooden ring. Sew the head to the ring. Make sure to sew many stitches, back and forth, so that the head stays in place. Sew the ears on R10-11 of the head, about 5-6 slst away from the brim. Then sew
on 2 flowers where you attached the ear to the head. Secure and cut all yarn tails.
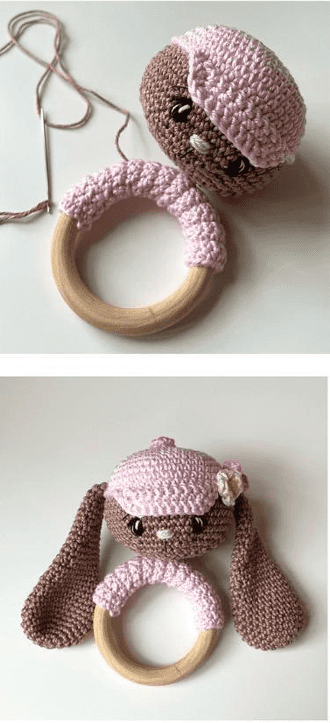
Congratulations, you have completed the amigurumi rattle pattern 🙂



 Bear
Bear Bunny
Bunny Cat
Cat Christmas
 Crochet doll
 Deer
Deer Other animals

