Hello everyone,
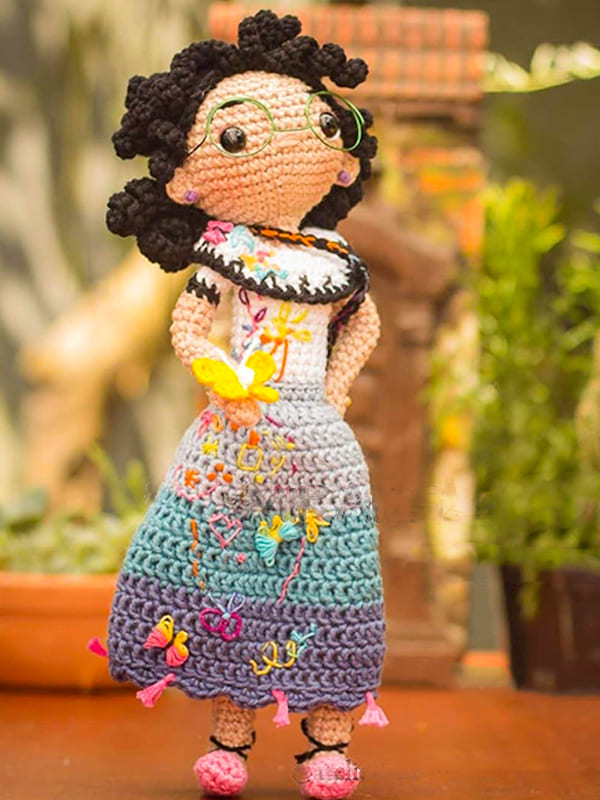
Today I shared the amigurumi doll mold made with spring colors for you. Free amigurumi pattern is easy to make step by step. You must have an intermediate knowledge of crochet. You can see how to make Maribel amigurumi doll’s foot and the flower detail on her hand, on the designer’s instagram page. You can crochet an amigurumi doll for your loved ones and children. You can use the Maribel amigurumi doll mold to decorate your home. Don’t forget to add the amigurumi toy to your favorites list.
PDF Crochet Doll Maribel Amigurumi Free Pattern
Designer: @atelierlechatsimone
Materials needed (for the entire recipe)
• Amigurumi thread or similar in colors: pink, beige, white, black, blue light, medium blue, dark blue, brown. The references used were respectively: 3182, 7650, 8001, 8990, 2927, 2930, 2931, 7220.
• Mixed Cléa thread 9233 and 9976 (to embroider the dress) and thread pink embroidery (to make the skirt tassels) and purple (for the earrings)
• Crochet hook 2.5 or 3.0mm, tapestry hook, embroidery, eyes with 10mm lock, hot glue, filling, wire for
the arms (thicker, but optional) and wire for the glasses (soft, green, found in haberdashery or jewelry).
Abbreviations
Ch– chain
Sc– single crochet
Slst– Slip Stitch
BLO – Back loop only
Dec– decrease
Inc– increase
Dc– double crochet
Pp– popcorn stitch (Click the link to see how it’s done)
Incdc – increase with dc
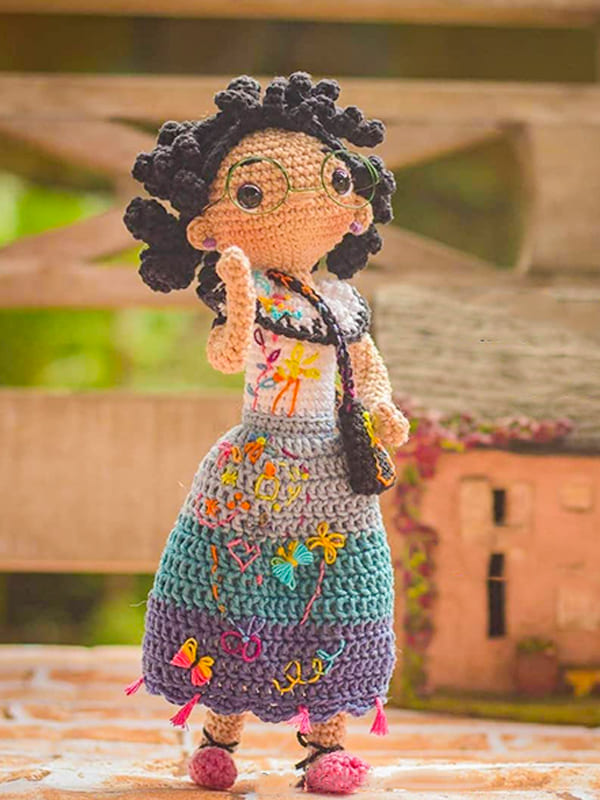
Using Amigurumi yarn and a 3.0mm crochet hook, the piece is about 28 cm tall.
Legs (2x)
Toe
In pink. 5 ch
Rnd 1. from the 2nd ch, 3sc, 3sc last stitch, 3sc on the other side of ch (9)
Rnd 2-4. 9sc (9)
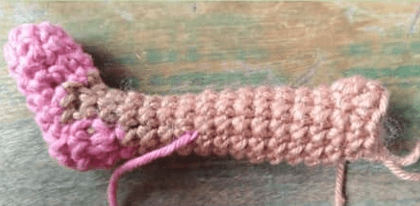
Heel and ankle
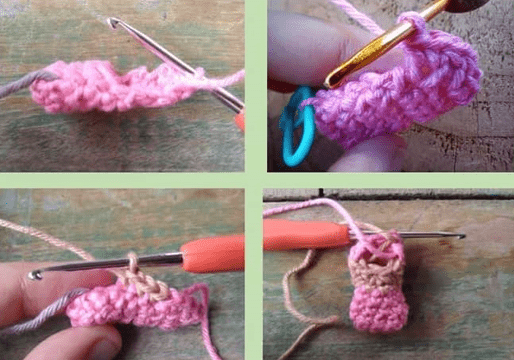
Let’s start the heel sole in small back and forth rows:
Rnd 5. Another 1sc, turn, 4sc (5)
Rnd 6. 1ch, turn, 4sc (4)
Rnd 7. 1ch, turn, skip 1 stitch, 3sc (3)
Rnd 8. 1ch, turn, skip 1 stitch, 2sc (2)

Now we go back to the spirals to crochet around this opening, forming the heel. The color change appears
between parenthesis:
Rnd 9. (pink) 2sc on the side of the foot, (beige)2sc on the side of the foot, 1sc, 1dec, 2sc, 2sc on the other side of the foot, (pink) 4sc
Rnd 10. (still in pink) 2sc, (beige) 4dec, (pink) 1dec, 2sc. follow towards the tip of the foot with 1dec in the two dots pink.
Continue only in beige. Place the stitch marker on the next stitch. Go filling.
Rnd 11-14. 8sc (8)
Rnd 15. 1inc, 7sc (9)
Rnd 16. 9sc (9)
Rnd 17. 7sc, 1inc, 1sc (10)
Rnd 18-22. 10sc (10)
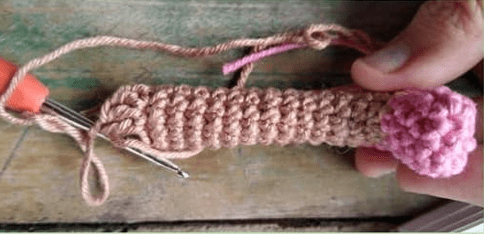
In the next row we will make the elevation that corresponds to the knee with high stitch. Remember that the knee must be facing forward!
Rnd 23. 3sc, 1inc dc, 1dc, 3sc, 1dec (10)
Rnd 24. 2sc, 1inc, 1dec, 2sc, 1inc, 2sc (11)
Rnd 25. 2sc, 1inc, 5sc, 1inc, 2sc (13)
Rnd 26-28. 13sc (13)
White
Rnd 29-30. 13sc (13)
Rnd 31. 6sc, 1inc, 6sc (14)
Rnd 32-34. 14sc (14)
Tip! On this last row, do more or less stitches to the last stitch is between the legs. The twist that occurs naturally it can be bigger or smaller according to the stitch, for this is important to adjust.
Upper leg
Keep on white
On the second leg, go up 3ch and join with 1sc on the other leg. Place the marker here, this is the first stitch of the new row.
Rnd 1. 14sc on the leg, 3sc in the ch, 14sc on the other leg, 3sc in the ch (34)
Rnd 2-4. 34sc
Rnd 5. (9sc, 1dec)x3 (30)
Rnd 6. (4sc, 1dec)x5 (25)
Rnd 7. (3sc, 1dec)x5 (20)
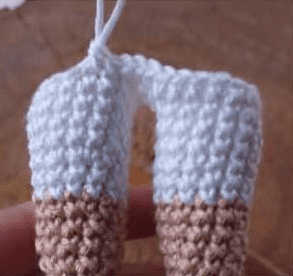
If you’re not in the middle of the back, continue a few more stitches until you get there. Change to light blue
Rnd 8. 20sc (20)
Rnd 9. 20 BLO (20) – attention – important to do in BLO because it is here that we’ll fasten the skirt later!
Rnd 10. 20sc
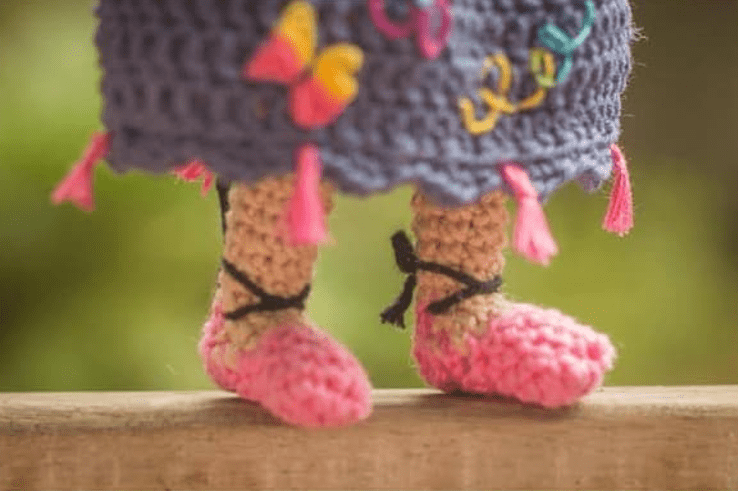
With the black yarn, tie Mirabel’s shoe.
Arms (2x)
Do not fill. start with beige
Rnd 1. 6sc in the magic ring
Rnd 2. 6sc
Rnd 3. 1sc, 1pp (only with 3 sticks), 4sc (6)
Rnd 4-7. 6sc (6)
Rnd 8. 5sc, 1inc (7)
Rnd 9-12. 7sc (7)
Rnd 13. 6sc, 1inc (8)
Rnd 14-15. 8sc (8)
Rnd 16. (black) 8sc (8)
Rnd 17-20. (White 8sc (8)
Continuation of the Body
Continue from hip, row 10.
White
Rnd 11. 20BLO
Rnd 12-16 20sc
Rnd 17. 8sc, (1inc, 1sc)x4, 4sc (24)
Rnd 18-19. 24sc
Rnd 20. 8sc, (1dec, 1sc)x4, 4sc (20)
Now, position your arms at your sides with your thumbs facing forward.
Rnd 21. 6sc on body, 8sc in the left arm, 11sc at front of body, 8sc on right arm, 3sc on body (36)
Rnd 22. (1sc, 1dec)x12 (24)
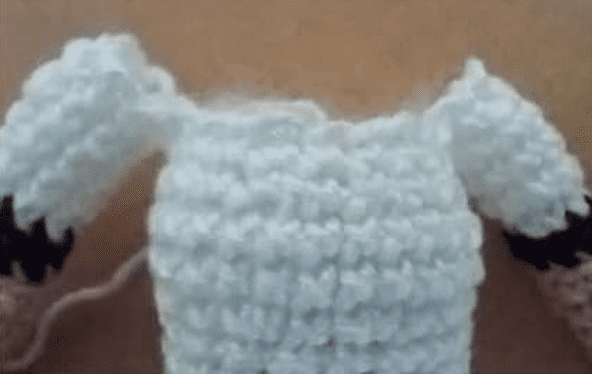
Close the holes in the armpits with the tapestry needle and white yarn.
Beige
Rnd 23. 12dec in BLO (12)
Inserting the wire is optional. Take care to seal with the tape at the ends. I left the double wire with the two
ends meeting in the middle, protected with silver tape. The ends reach up to the doll’s wrists.
Rnd 24. 6dec (6)
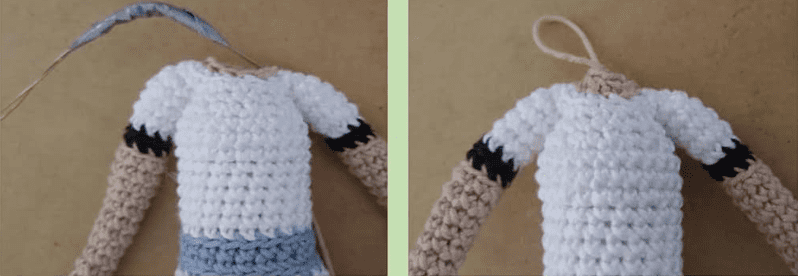
Blouse Collar
White
Do it before making the head, in the front loops of the row 22.
Rnd 1. 24inc (48)
Rnd 2-3. 48sc
Rnd 4. (3sc, 1dec)x10 (38)
Black
Rnd 5. 38sc
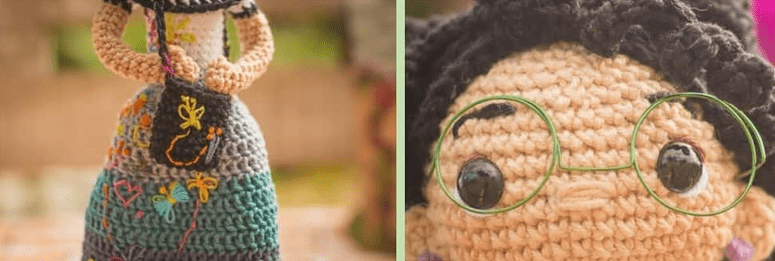
Embroider in black some cross stitches that will correspond to the butterflies.

Skirt
Light blue
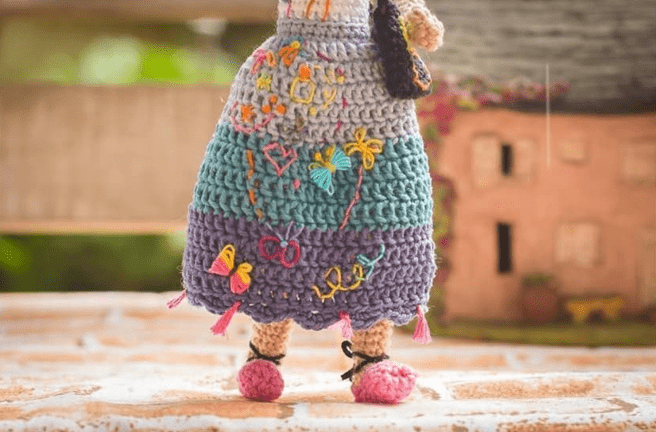
Work in the front loops of row 8. We will not crochet in spirals, always at the beginning of each row raise 2ch and at the end secure with a slst.
Rnd 1. (1dc, 1incdc)x10 (30)
Rnd 2. (2dc, 1incdc)x10 (40)
Rnd 3-5. 40dc
Medium blue
Rnd 6. 40dc
Rnd 7. (3dc, 1incdc)x10 (50)
Rnd 8-9. 50dc
Dark blue
Rnd 10-13. 50dc
Rnd 14. Do not go up ch. (skip 1 stitch, 4sc in the same stitch, skip another stitch, 1slst)x12. Make 6 mini tassels and attach to the bar.

Head
Finished the body, let’s go to the head. Continue after round 24.
Beige
Rnd 1. 6sc (6)
Rnd 2. 6inc (12)
Rnd 3. (1sc, 1inc)x6 (18)
Rnd 4. (2sc, 1inc)x6 (24)
Rnd 5. (3sc, 1inc)x6 (30)
Rnd 6. (4sc, 1inc)x6 (36)
Insert a piece of hot glue tube to secure the neck.
Rnd 7. (5sc, 1inc)x6 (42)
Rnd 8-14. 42sc
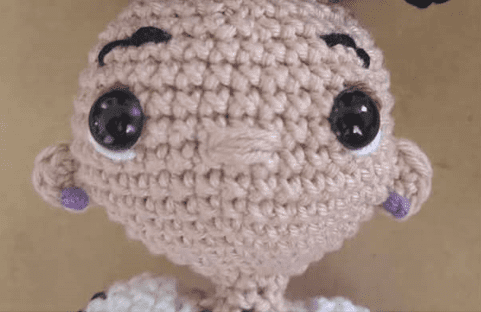
Insert the eyes between rows 11 and 12. I left 7 stitches between the eyes.
Rnd 15. (5sc, 1dec)x6 (36)
Rnd 16. (4sc, 1dec)x6 (30)
Rnd 17. (3sc, 1dec)x6 (24)
Fill with fiber.
Rnd 18. (2sc, 1dec)x6 (18)
Rnd 19. (1sc, 1dec)x6 (12)
Rnd 20. 6dec (6)
Close with the inverted magic ring.
Ears (2x)
Beige
Rnd 1. 5 sc in the magic ring. Sew on the sides but rows 8 and 9.
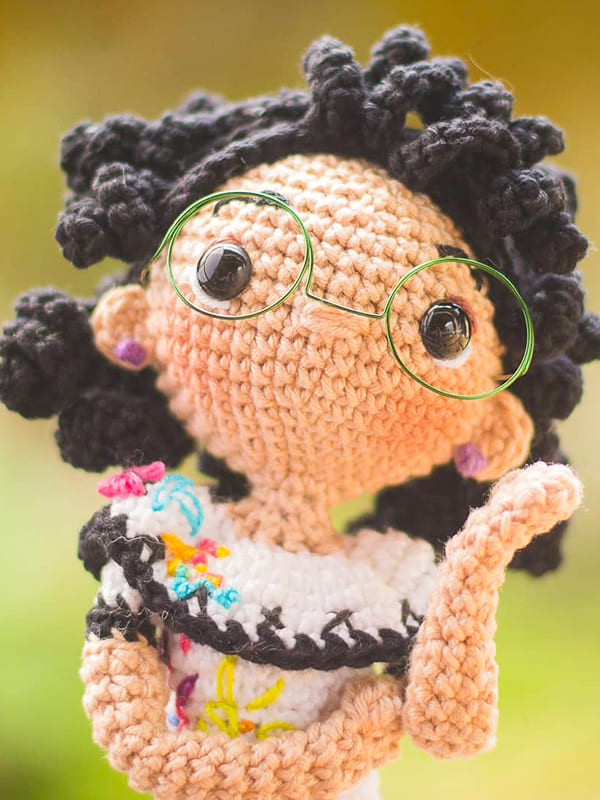
French knot each earlobe with the purple yarn to represent the earrings. Embroider the nose between rows 10 and 11, the white and brown of the eyes and the eyebrows. Apply a little blush on your cheeks.
Hair
Black or very dark brown
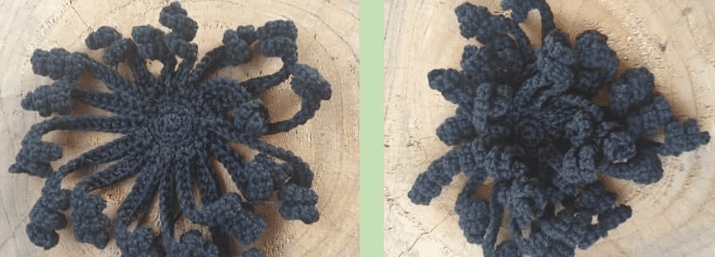
Rnd 1. 6sc in the magic ring
Rnd 2. 6inc (12)
Rnd 3. (1sc, 1inc)x6 (18) – in BLO (to make the second layer of locks later!)
Once this part is done, we start the curls. At each of the 18 stitches, chain up and back as specified, securing with a slst at the end of each strand.
Rnd 1-5 (Stripe). 15 ch, skip one ch, 10inc, 4sc
Rnd 6-7. 21 ch, skip one ch, 12inc, 6sc
Rnd 8-16. 24 ch, skip one ch, 12inc, 11sc
Rnd 17-18. 21 ch, skip one ch, 12inc, 6sc
Hair (continued)
2nd row of curls
We will make 12 smaller curls using the front loops from row 2, in the same scheme as above.
Rnd 1-12. 15ch, 10inc, 4sc
To secure on the head, glue the center part to the top first, with the bangs facing forward. I use hot glue, but you have to be very careful not to show the glue. You can also use universal glue. Secure the strands with pins and glue gradually. Fix the top strands and glue where necessary.

Handbag
Black or dark brown
8ch
Rnd 1. skip the first chain, 6sc, 3sc last stitch, 4sc on the other side, 1inc.
Rnd 2-8. 15sc
Finish on the side with 1slst. Join with Clea 9233 and crochet 32 chains. Attach to the other side of the bag.
Do the embroidery on the front.
Glasses
Shape the green wire, adjusting according to the spacing between the eyes. Tuck behind the ears.
Remember that glasses can be dangerous for younger children.
Congratulations, you have completed the amigurumi pattern. 🙂


 Bear
Bear Bunny
Bunny Cat
Cat Christmas
 Crochet doll
 Deer
Deer Other animals

