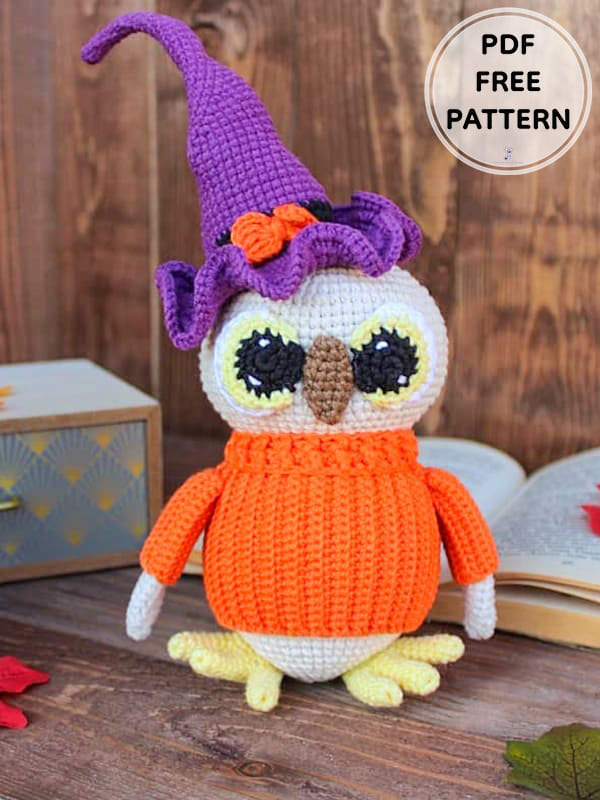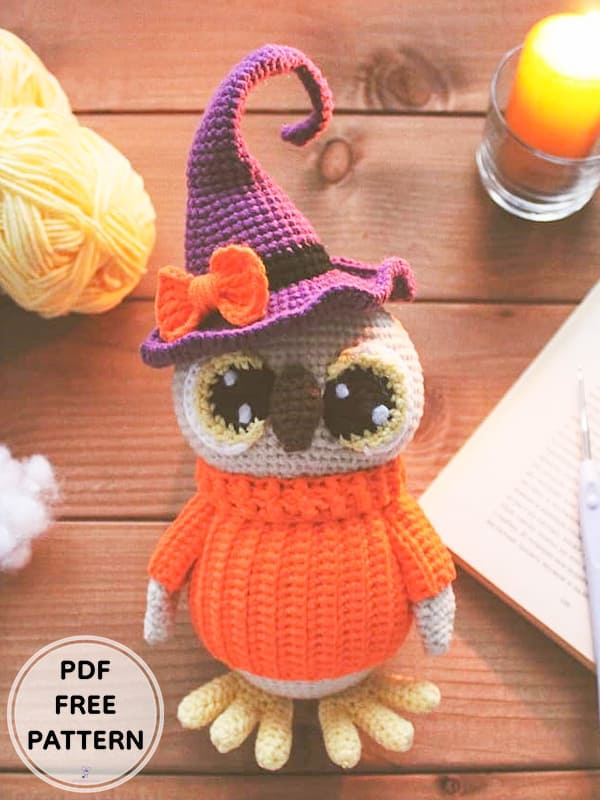
Greetings friends, we continue our amigurumi adventures with halloween crochet patterns. First of all, I would like to thank the pattern designer for the crochet owl pattern. Thanks to the step by step detailed and easy-to-follow crochet owl pattern instruction, you can complete the cute owl without difficulty even if you are a beginner. The size of the completed amigurumi owl is 20 cm, excluding its hat. Take a look at the free pattern instruction to complete the Halloween crochet owl amigurumi toy right now.
Halloween Crochet Owl Amigurumi PDF Free Pattern
Designer: juli_mitoys
Abbreviations
MR: Magic ring
Sc: Single crochet
Inc: Increase
Dec: Decrease
Slst: Slip stitch
Ch: Chain
Dc: Double crochet
Hdc: Half double crochet
Head
Rnd 1) 6 sc in MR (6)
Rnd 2) (inc)х6 (12)
Rnd 3) (1 sc, inc)х6 (18)
Rnd 4) (2 sc, inc)х6 (24)
Rnd 5) (3 sc, inc)х6 (30)
Rnd 6) (4 sc, inc)х6 (36)
Rnd 7) (5 sc, inc)х6 (42)
Rnd 8) (6 sc, inc)х6 (48)
Rnd 9) (7 sc, inc)х6 (54)
Rnd 10) (8 sc, inc)х6 (60)
Rnd 11) (9 sc, inc)х6 (66)
Rnd 12) (10 sc, inc)х6 (72)
Rnd 13-18) 72 sc (6 row)
Rnd 19) 16 sc, (inc)х3, 34 sc, (inc)х3, 16 sc (78)
Rnd 20) 78 sc
Rnd 21) (11 sc, dec)х6 (72)
Rnd 22) (10 sc, dec)х6 (66)
Rnd 23) (9 sc, dec)х6 (60)
Rnd 24) (8 sc, dec)х6 (54)
Rnd 25) (7 sc, dec)х6 (48)
Rnd 26) (6 sc, dec)х6 (42)
Rnd 27) (5 sc, dec)х6 (36)
Leave the thread for sewing.
Eyes
Black color:
Rnd 1) 6 sc in MR (6)
Rnd 2) (inc)х6 (12)
Rnd 3) (3 sc, inc)х3 (15)
In yellow:
Rnd 4) 3 sc, inc, 3 sc, inc, 2 sc, inc, slst (15)
Expand crocheting and into the second loop.
Rnd 5) slst, in after.slst, 1 sc, (2 hdc, inc. from hdc)х2, 2 hdc, sc, slst.
Cut the thread.
Step back from the yellow edge 2 loops and in 3 do ch.
In the next loops sc, inc, (1 hdc, inc from hdc) x2, 3 hdc, inc from sc, 2 slst.
Beak
Rnd 1) 6 sc in MR (6)
Rnd 2) 6 sc
Rnd 3) (1 sc, inc)х3 (9)
Rnd 4-7) 9 sc
Rnd 8) 4 dec.
Body
Rnd 1) 6 sc in MR (6)
Rnd 2) (inc)х6 (12)
Rnd 3) (1 sc, inc)х6 (18)
Rnd 4) (2 sc, inc)х6 (24)
Rnd 5) (3 sc, inc)х6 (30)
Rnd 6) (4 sc, inc)х6 (36)
Rnd 7) (5 sc, inc)х6 (42)
Rnd 8) (6 sc, inc)х6 (48)
Rnd 9-10) 48 sc (2 row)
Rnd 11) (7 sc, inc)х6 (54)
Rnd 12) 54 sc
Rnd 13) (8 sc, inc)х6 (60)
Rnd 14) (9 sc, inc)х6 (66)
Rnd 15-24) 66 sc (10 row)
Rnd 25) (9 sc, dec)х6 (60)
Rnd 26) (8 sc, dec)х6 (54)
Rnd 27) (7 sc, dec)х6 (48)
Rnd 28) (6 sc, dec)х6 (42)
Rnd 29) (5 sc, dec)х6 (36)
Wings (Make 2)
Rnd 1) 6 sc in MR (6)
Rnd 2) (2 sc, inc)х2 (8)
Rnd 3) (3 sc, inc)х2 (10)
Rnd 4) (4 sc, inc)х2 (12)
Rnd 5) (5 sc, inc)х2 (14)
Rnd 6-17) 14 sc (12 row)
Rnd 18) 7 dec.
Legs (Make 2)
Rnd 1) 7 sc in MR (7)
Rnd 2-7) 7 sc (6 row)
We crochet 2 fingers. We continue from the third.
Rnd 8) 3 sc, on the second 3 sc, on the first 3 sc, on the side 1 sc.
Also on the other side 3 sc on each finger + 1 sc on the side (20)
Rnd 9) 3 sc, dec, 8 sc, dec, 5 sc (18)
Rnd 10) 3 sc, dec, 7 sc, dec, 4 sc (16)
Rnd 11) (3 sc, dec)х3, 1 sc (13)
Rnd 12) (2 sc, dec)х3, 1 sc (10)
Rnd 13) (1 sc, dec)х3, 1 sc (7)
Hat
Rnd 1) 5 sc in MR (5)
Rnd 2-11) 5 sc (10 row)
Rnd 12) inc, 4 sc (6)
Rnd 13) inc, 5 sc (7)
Rnd 14) inc, 6 sc (8)
Rnd 15) inc, 7 sc (9)
Rnd 16-19) 9 sc (4 row)
Rnd 20) inc, 8 sc (10)
Rnd 21) inc, 9 sc (11)
Rnd 22) inc, 10 sc (12)
Rnd 23) inc, 11 sc (13)
Rnd 24) inc, 12 sc (14)
Rnd 25) inc, 13 sc (15)
Rnd 26) inc, 14 sc (16)
Rnd 27) inc, 15 sc (17)
Rnd 28) inc, 16 sc (18)
Rnd 29) inc, 17 sc (19)
Rnd 30) inc, 18 sc (20)
Rnd 31) inc, 19 sc (21)
Rnd 32) (9 sc, inc)х2, 1 sc (23)
Rnd 33) (10 sc, inc)х2, 1 sc (25)
Rnd 34) (11 sc, inc)х2, 1 sc (27)
Rnd 35) (12 sc, inc)х2, 1 sc (29)
Rnd 36) (13 sc, inc)х2, 1 sc (31)
Rnd 37) (14 sc, inc)х2, 1 sc (33)
Rnd 38) (15 sc, inc)х2, 1 sc (35)
Rnd 39) (16 sc, inc)х2, 1 sc (37)
Rnd 40) (17 sc, inc)х2, 1 sc (39)
Change color to black:
Rnd 41-43) 39 sc (3 row)
Change to purple, behind the front wall:
Rnd 44) (12 sc, inc)х3 (42)
Rnd 45) (6 sc, inc)х6 (48)
Rnd 46) (7 sc, inc)х6 (54)
Rnd 47) (8 sc, inc)х6 (60)
Rnd 48) (9 sc, inc)х6 (66)
Rnd 49-50) 66 sc (2 row)
Rnd 51) Alternate 2 sc in 1 loop and 3 sc in 1 loop to the end of the row.
Rnd 52) We crocheting all the loops without change.
Pullover
Make on 20 ch + 1 st. We will knit the sweater in turning rows behind the back wall of the loop with single crochets. We knit and try on the body. The sweater must be tight, otherwise it will roll down. We knit the desired length! We fit the body and connect the ends with a hook. On the one hand, we grab a half-loop, on the other hand, a full-fledged loop and crochet slst. Cut and fasten.
Now you can sew on the head.
Sleeves
We select the desired length of the sleeve. I have 14 ch + 1 ch.
We knit the width to close the edges on the wing. I have 15 rows. We also crochet on the wing, just like a sweater.
Collar
We collect the desired length for the girth of the neck + 2 ch.
1 row: we knit dc.
2-3 row: embossed columns.
Bow
In a sliding loop sc, 4 ch, 4 sc. With two crochets, 4 ch, sc, 4 ch, 4 sc. with 2 crochets, 4 ch, sc, sl st in the ring. We tighten.


 Bear
Bear Bunny
Bunny Cat
Cat Christmas
 Crochet doll
 Deer
Deer Other animals

