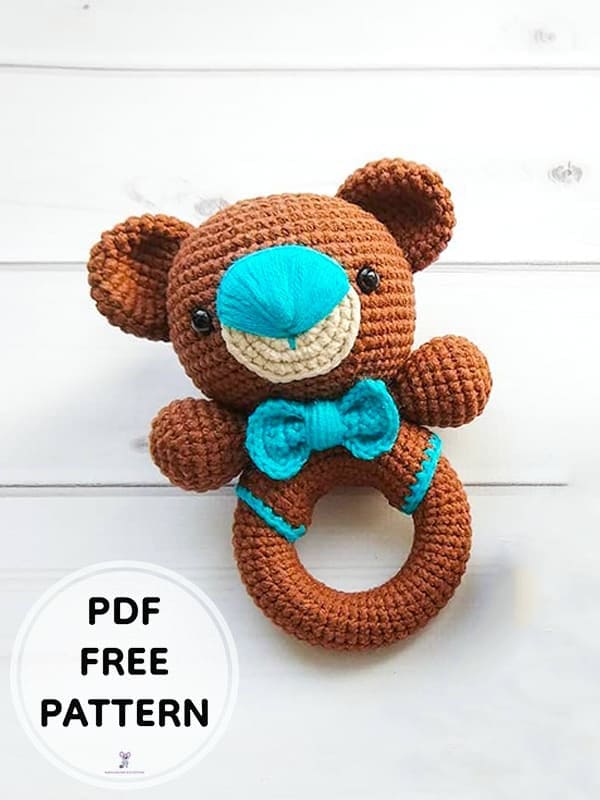
Hello everyone, today I will give you a crochet teddy bear rattle amigurumi pattern. First of all, I would like to thank the owner of the pattern. Thanks to the step by step detailed crochet teddy bear rattle amigurumi pattern, you can complete the free pattern quickly and easily. It is an easy amigurumi pattern for beginners. Just follow the instructions to make a handmade and safe crochet rattle for your babies. Stay tuned for many more free amigurumi patterns.
Crochet Bear Puffy Rattle PDF Amigurumi Free Pattern
Designer: Tatyana Paşeva
Materials:
• cotton or cotton/acrylic yarn (Alize Cotton Gold, YarnArt Jeans, Vita Lira, etc.);
• eyes for toys (safe – with fastening from the inside of the part);
• sintepuh or other suitable stuffing material;
• wooden ring with an outer diameter of 55 mm;
• rattle (a container with beads or special fittings).
• hook number 2mm
• scissors
• tweezers or stuffing clip
• needle
Abbreviations
Ch: Chain
Sc: Single crochet
Slst: Slip stitch
Dec: Decrease
Inc: Increase
MR: Magic ring
Ring binding:
Dial about 13 ch on the thread. Try on the ring. The binding should not be too tight so that you can turn the ring under it, but it should not hang out either. We close the chain in a ring around the wooden base and start crochet in a spiral single crochets until we tie the entire base. Turn as you knit knitting around the warp. When you come to the end, align the entire canvas and sew the ends strapping. Tie the thread in a knot and hide in the canvas.
Clutch:
Make ch on the threads again, this time about 16 (try on a tied ring).
Lock into a ring and make a lifting loop. This detail must be crocheted using slst and ch in every row. We crochet 18 rows in this way. At the end of the last row, change the color of the thread. on the other, we fill the ponytails into columns. We knit the last slst, pull the thread and
we restore the edge of the part (cut the thread of sufficient length), then we fill it under columns from the wrong side. We attach the thread of the same color to the other side muffs and also tie and decorate it. There should be 20 rows in total. We unfold the sleeve with the seam down, on the inside of the ring.
Handles
2 parts in a spiral without ch and slst.
Rnd 1. 2 ch, 6 sc in the first loop (6) or MR
Rnd 2. 6 inc (12)
Rnd 3. (1,inc)*6 (18)
Rnd 4. 1,inc, (2,inc)*5,1 (24)
Rnd 5-6. 2 rows (24)
Rnd 7. (2,dec)*6 (18)
Rnd 8-9. 2 rows (18)
Rnd 10. (1,dec)*6 (12)
Rnd 11. (dec)*6 (6)
Fold in half and connect the halves with 3 sc, knot, cut a long thread for sewing. We sew the handles to the seventh row of the clutch on each side, the thread tie a knot and hide.
Head
In a spiral without ch and slst.
Rnd 1. 2ch, 6sc in the first loop (6) or MR.
Rnd 2. 6 inc (12)
Rnd 3. (1,inc)*6 (18)
Rnd 4. 1,inc, (2,inc)*5, 1 (24)
Rnd 5. (3,inc)*6 (30)
Rnd 6. 2,inc, (4,inc)*5, 2 (36)
Rnd 7. (5,inc)*6 (42)
Rnd 8. 3,inc, (6,inc)*6 (48)
Rnd 9. (7,inc)*6 (54)
Rnd 10. 4, inc, (8,inc)*5, 4 (60)
Rnd 11-18. 8 rows (60), eyes are inserted after 14 rows at a distance of 14 sc from each other.
Rnd 19. 4,dec, (8,dec)*5, 4 (54)
Rnd 20. (7,dec)*6 (48)
Rnd 21. 3, dec, (6,dec)*5, 3 (42)
Rnd 22. (5,dec)*6 (36)
Rnd 23. 2, dec, (4,dec)*5, 2 (30)
Rnd 24. (3,dec)*6 (24), here you can put a rattle in your head.
Rnd 25. 1, dec, (2,dec)*5, 1 (18)
Rnd 26. (1,dec)*6 (12), slst, cut and thread a long thread for sewing, restore the edge.
Ears
In spirals.
Rnd 1. 2ch, 6 sc in first loop (6) or MR.
Rnd 2. 6 inc (12)
Rnd 3. (1,inc)*6 (18)
Rnd 4. 1,inc, (2,inc)*5, 1 (24)
Rnd 5-7. 3 rows (24)
Rnd 8. (2,dec)*6 (18), slst, cut and thread a long sewing thread, restore edge.
Muzzle
In spiral.
Rnd 1. 2ch, 6sc in first loop (6) or MR
Rnd 2. 6 inc (12)
Rnd 3. (1,inc)*6 (18)
Rnd 4. 1, inc, (2,inc)*5, 1 (24)
Rnd 5. (3,inc)*6 (30), slst, cut and thread a long thread for sewing, restore edge.
We sew the muzzle flat, we embroider the nose with smooth stitch.
Bow
8 ch, then we crochet turning 10 rows. At the end we do 1 ch and tie rectangle around the perimeter (in the corners of 3 sc). We transfer with connecting posts thread to the middle of the wide part, pull out a very long thread (about a meter), restore edge. Then fold the rectangle and fix the folds with using a needle, then wrap the butterfly in the middle. Thread with several stitches fasten at the back, pull out the loop and crochet about 14 ch (try on the neck of the toy). We tighten the thread with a knot, wrap the toy’s neck with a chain and sew it to the bow with the other side.


 Bear
Bear Bunny
Bunny Cat
Cat Christmas
 Crochet doll
 Deer
Deer Other animals

